Tony and I had an amazing weekend with my sister-in-law, Lori and nephew, Tyler from Georgia Tyler
Since Pinterest has taken over my life recently…yes, I am seriously addicted. I have discovered some wonderful new recipes. The following is another one of my recent finds. The Baked Brownie is claimed to be one of Oprah’s favorite things. Well I am not sure about Oprah but it is definitely one of Shelley’s favorite things…hands down the best brownies I have ever made or eaten. Again, I am glad cheat day is only once a week or I would be “huge-er”.
 |
| The Baked Brownie...not sure why it is called the "baked" brownie...Don't you bake all brownies? |
This recipe is adapted from the BrownEyed Baker.
Yield: 24 brownies
Prep Time: 30 minutes | Bake Time : 30 minutes
1¼ cups all-purpose flour
1 teaspoon salt
2 tablespoons dark unsweetened cocoa powder
11 ounces dark chocolate, coarsely chopped (I used semi sweet chocolate chips)
3/4 cup unsalted butter, cut into 1-inch pieces
4 T. of Heavy Whipping Cream
1 teaspoon instant espresso powder
1½ cups granulated sugar
½ cup packed light brown sugar
5 eggs, at room temperature
2 teaspoons vanilla extract
1. Preheat the oven to 350 degrees F. Butter the sides and bottom of a 9×13-inch glass or light-colored baking pan. Line the pan with parchment paper.
2. In a medium bowl, whisk the flour, salt, and cocoa powder together.
3. Put the chocolate, butter and instant espresso powder in a large bowl and set it over a saucepan of simmering water, stirring occasionally, until the chocolate and butter are completely melted and smooth. Turn off the heat, but keep the bowl over the water and add the sugars. Whisk until completely combined, then remove the bowl from the pan. The mixture should be room temperature.
4. Add 3 eggs to the chocolate mixture and whisk until combined. Add the remaining eggs and whisk until combined. Add the vanilla and stir until combined. Do not overbeat the batter at this stage or your brownies will be cakey.
5. Sprinkle the flour mixture over the chocolate mixture. Using a rubber spatula (not a whisk), fold the flour mixture into the chocolate until just a bit of the flour mixture is visible.
6. Pour the batter into the prepared pan and smooth the top. Bake in the center of the oven for 30 minutes, rotating the pan halfway through the baking time, until a toothpick inserted into the center of the brownies comes out with a few moist crumbs sticking to it. Let the brownies cool completely, then lift them out of the pan using the parchment paper. Cut into squares and serve.
7. Store at room temperature in an airtight container or wrap with plastic wrap for up to 3 days.
(Recipe adapted from Baked: New Frontiers in Baking )
)
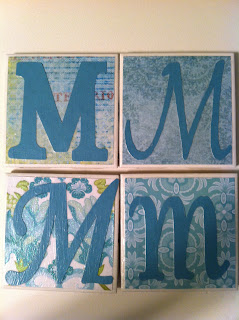
)Tyler, Lori and I had fun making some more coasters. Super easy and fun gifts.


Have a blessed day!


